27 December 2014

Hand-made tasty present from Santa - ginger cookies

The decorations are ready, everyone is crazy shopping and preparing. New Year is so close.
Unfortunately, we sometimes face a problem when looking for presents. Wrong color, size not available, too expensive, too simple... One big headache. And I can cure it. Well, maybe not truly me, but tasty home-made cookies - definitely!


No special ingredients, you will probably have all of them ready-to-go:

100 g butter
1/2 cup honey
2 tbsp sugar (*optional)
1 egg
1 cup white flour
2 cups whole wheat flour
1 tsp ground ginger
1 tsp cinnamon
1/2 tsp ground cloves
1 tsp baking powder
1/4 tsp salt

In a saucepan heat first three ingredients; butter, honey and sugar.

Tip!
I would say that the amount of sugar can be reduced as honey adds the sweetness. Especially use this advice if you want to cover the cookies with chocolate glaze afterwards.

Stir the mixture all the time and make sure that the mixture doesn't boil. Put aside to cool for a while. Meanwhile in a bowl whisk together both types of flour, spices and baking powder. Add a half of dry ingredient mixture into warm sweet honey-butter composition. Mix thoroughly, then add in second half and an egg.

Cover dough tightly with plastic wrap and chill in fridge for 30 minutes.


Preheat oven to 190° C. Prepare the cookies-forms. Take dough out of the fridge, roll it so that it is less than 0.5 cm thick. Cut different shapes of the cookies.
Bake them for 7-9 minutes, or until cookies get golden-brown edges.

Let them coll down and cover with sugar powder.


17 December 2014

Bacon rolled venison tenderloin under wine-cranberry sauce on a arugula pillow

Last days turned to be so windy in Hamburg that you sometimes feel yourself being literally blown away. But its just typically here, no reason to wonder. Hamburg is beautiful at any weather. At the other hand, last weeks were very special for food-lovers. Firstly, you can find a wide range of meat on the shelves of supermarkets: venison, wild boar, rabbit, goose, duck etc. Secondly, the Christmas markets are already opened. Everywhere!  A smell of freshly baked maroons mixed with sweet flavors of Stollen - a typical Christmas bread originally from Dresden, and the spicy aroma of a hot wine - Glühwein in German. Do you already feel Christmas knocking on your door?! Yeap, holidays are coming. Almost a week left. Let us go wild!


I was surprised and confused when my husband brought venison from the supermarket. I have never tried one, so I wondered: What would it taste like? What should be the best combination? Is it tastier with a sweet note or better salty? The next couple of hours I found myself at the laptop searching for the information, nutritional facts and the best combinations. I watched videos from the famous chefs, read articles and now I’m ready to share the “wild” facts and the best recipe choice with you.

And don’t be afraid. No special requirements from you. Just a strong desire and a little bit of your precious time.

By the way, deer meat is high in nutritional value. It contains iron, which is good for those, who have a lack of it, as well as vitamin B2 that will speed the metabolism. If you think that venison as wild meat has gamey smell I assure you – not at all. The taste is very juicy with a tender sour-sweet note if you cook it the way I advise.

Tip!

I’ve used a shoulder part of venison. If you are lucky to buy venison tenderloin, that is even better. The deer meat has a dark color, and that is explained with the following: deer are very active and the oxygen goes through their muscles in big amounts. Therefore they become darker. That explains why chicken meat (especially from those raised by big suppliers) is very bright.

My favorite recipe combines medium rare bacon rolled lean meat under the wine-cranberry sauce on the arugula pillow.

Get some patience and prepare the following ingredients:

300 g venison loin or shoulder
4 thin stripes of lean bacon
100 ml dry red wine
100 g dried cranberries
1 tsp sour cherry jam or wind berries jam* (optional)
1 tbsp butter
2 tbsp olive oil
1 onion
handful of arugula
salt, pepper

Let us prepare everything step by step:

Step 1

Preheat the oven to 200°C. Wash the meat and cut the needed piece so that you can roll it into the bacon stripes afterwards (see picture below).

Salt and pepper the piece of venison from all sides. Roll it as shown on the picture. The bacon dress protects the lean meat and keeps it juicy and tender.

*I cooked one piece of venison. The other is just for comparison. 


Step 2

Put olive oil and butter into a frying pan. The best choice is a pan that can be put into the oven afterwards. Otherwise prepare a baking form or a piece of foil. Heat the pan and fry the rolled piece from all sides for about 10 minutes in total. The sign of perfection is the crispy golden-brown bacon crust.

Step 3

Put the meat into the oven for 7 minutes sharp. And now ATTENTION, please!
Take venison out of the oven and put it aside. Let it rest for 10-15 minutes. It enables the juices to get back from the center, where they concentrated because of the heat, all over the piece. As a result you get a perfect juicy and tender, yet medium rare venison with a bacon crust full of flavors.

Step 4

Meanwhile we can prepare a wine-cranberry sauce that will complement the taste of the meat with some sour-sweet notes. So, finely chop the onion. Fry it in a saucepan with some olive oil mixed with butter (1 tsp of each). Add a pinch of salt. When the onion is brown add cranberries and jam*.  In a minute pour 100 ml of wine and let it boil for a while. Wine should evaporate so that the sauce gets a bit thicker. Afterwards blend the sauce using a stick mixer.

Serve sliced venison on a arugula pillow with a sauce topping.


Let you enjoy the fullness of the taste. Every single piece brings a magic combination of smoky flavor, sour and sweet notes of the sauce, as well as a tender juicy meat.

All in all, enjoy.

Because good food is always a good idea. Especially, when it is "wild" :)


12 December 2014

Christmas Carrot Pie

Holidays are coming. And the smell of hot wine is in the air. Ginger cookies, Stollen - traditional Christmas Pie in Germany, baked maroons, a wide range of cute little sweet-Christmas-stuff is out there in the nearest bakery round the corner. But what can be better than a home-made pie?! Especially, when the main ingredient seems to be not so typical for bakery.


Carrots! Yes, carrot pie with a sweet note of Christmas flavors. Healthy, easy and soooo tasty.

Don't be scared when you see the list of ingredients. The instructions are very simple. If you have children, do not hesitate to bake a pie in cooperation with them. They will help you with pleasure.

Ingredients:

5 middle-sized carrots
5 eggs
2 tbsp ground peanuts
4 tbsp whole grain flour
2 tbsp wheat bran
1 banana
3/4 cup raisins
150 ml milk
Winter ground spices: cinnamon, nutmeg, star anise, cloves, ginger - 1/2 tsp each.
Water to plump up the raisins


Firstly, preheat the oven to 180°C.
Secondly, boil the water. We should plump up the raisins so that they are soft, juicy and plump. Put your raisins in a small bowl, and cover with boiling water. Let them steep for about 10-15 minutes and then drain them thoroughly.

Meanwhile to take a big bowl. Wash the carrots, peel them and grate them all into a bowl. Add one mashed banana for sweetness, ground peanuts for nutty smell and taste. I added 2 tbsp of wheat bran, but if you don't have any, you can add 1 extra tbsp of whole wheat flour instead. I prefer to add some bran into my dishes in order to increase fiber intake. It has a lot of benefits for our health as well. But, anyway, this ingredient is optional. Add other ingredients: 4 tbsp of whole grain flour, spices, 150 ml of milk and drained raisins. Finally it's eggs' turn. Mix it all very thoroughly. Pour the mixture into a previously buttered form. You can bake muffins from this mixture as well. It's up to you;)

Cover the form with a sheet of foil. Bake this delicious pie 15 minutes at 180°C, then reduce the heat to 150°C and bake 40 minutes. Take of the foil and let the pie get nice brown color for another 10 minutes. Your house will smell like Christmas and you will hardly keep patience when you take the pie out of the oven.


I used some pistachios and white yogurt to serve.
Have a nice Christmas time and enjoy the company of good friends sharing your tasty results :)


4 December 2014

Fresh figs with Roquefort and balsamic cream

Big company is always a lot of fun. At the times of celebrations you can often find yourself hesitating... What to cook?! Of course, it should be something special - the occasion is always special. And preferably cooked very quickly and easy. For those days I have a great decision: figs. No, not simply figs, and not dried ones... I mean those fresh figs with a little piece of Roquefort under the balsamic topping. Perfect little appetizer you just HAVE to try.

Here we go;)


 Tip!
There is a great variety of cheese on the shelves of the supermarkets. If you prefer some other cheese instead of Roquefort you can add your own touch: goat cheese, gorgonzola, ricotta, blue cheese... Take your time and feel your heart. The amount in my case is made for two, keep that in mind when you have a big party.


Ingredients:
2 fresh figs
20g Roquefort
1 tsp balcamic cream

Wash the figs and make on each of them a cross-shaped incision. Open them a little like a flower. Here you get some place for Roquefort. Don't hesitate to put about 10g of the cheese in your flowers and top them with balsamic cream. 


Ready! Easy, quick and chic! 


23 November 2014

Filled zucchini boats

Today at a lack of time I want to share with you a simple recipe that can suit very good for lunch- or dinner-time when you don't want to do something sophisticated. It is low in calories, high in protein and therefore makes you fit and full.

So we're going to cook zucchini-boats filled with minced meat and baked under Parmesan crust. I was lucky to find this recipe in one of the food magazines when visiting my lovely sister in Prague. I've changed it a bit:) An by the way, the amount of ingredients here is taken for two.

Ingredients:

2 middle-sized zucchinis
250g minced meat of your choice
125g white yogurt
25g grated Parmesan
1 dried tomato
1 garlic clove
8 black olives (pitted)
salt, pepper

The preparations are quite easy. Preheat the oven to 180°C. Wash the zucchinis and cut them into halves lengthwise. With the help of a spoon take out the inner seeds and make some place for your filling. (not fEEling ;)
So now you have 4 boats, unfortunately empty :( Put them aside and give a rest. They need some staff :) Grab the meat.


Tip!
Once more: you can choose any time of minced meat. Keep in mind, that if you want the dish to be healthy, the meat should be low fat and fresh. Whether chicken or turkey, or even beef... Up to you.

Add sprinkle of salt and pepper, chopped dried tomato and pressed garlic clove. Mix well. If you have some dried herbs they will be a good addition here. The next step - filling the boats. Take your cute boats and fill them with the meat. To add crusty topping and some snowy effect mix yogurt and grated cheese and top the boats with it. But wait! Your boats need lifebuoy. Chop black olives and add a couple into every boat. Now perfect - ready to sail ;)

Bake them in the oven for about 30-40 minutes until golden-brown crust. And here you are: light and nourishing lunch-dinner-variation. A combination of veggie and meat, all-in-one and one for all. Because good food is always a good idea ;)

Have a nice start of the week! Bon appetit!


20 November 2014

Healthy "Nutella"-variation and breakfast idea

Nutella? Healthy? Why not?!

To tell the truth, I can barely name a person who hates "Nutella". Toast with it for breakfast, pancakes, of course, cookies and so on and so forth. But if you check the nutrition facts you will definitely get scared (if you can compare the facts and are aware of some simple nutrition basics) because of the following statements:
- 55% of it is simply sugar;
- 2 tbsp of "Nutella" = 200 calories;
- a half of the calories from this tasty spread comes from fats;
- I think I can continue and make a long list but I won't.

The thing is that we love something sweet with chocolate nutty taste. And the more - the better, the happier we seem to be. BUT! A clever person can find a good substitute and be even happier afterwards:)

I love avocados. They are flavorful, able to decrease bad cholesterol level and increase the good one. Once I had some time and good mood to create something special I decided to find out my "Nutella" substitute. After a couple of experiments I was satisfied: a creamy chocolate butter came into my world. And the recipe is easier than ever.


Ingredients:
2 avocados
8-10 pitted dates
2 tbsp cocoa powder
1 tsp honey
1 tbsp lemon/lime juice (optional)

An avocado has to be ripe. If you gently press on it and squeeze it in your palm it will yield the pressure.Once we have ripe avocados let's get started.


Tip!
By the way, the flesh turns brown very quickly after exposure to air. To prevent this, I suggest as an option to add a tbsp of lime or lemon juice.

Simply mix all the ingredients and mix them until smooth and creamy. Here you are;) Take a slice of some whole wheat bread, add 1-2 tbsp of your hand-made "Nutella"-variation and get all the benefits like essential vitamins and minerals, omega 3 fatty acids and pleasure with every bite.


15 November 2014

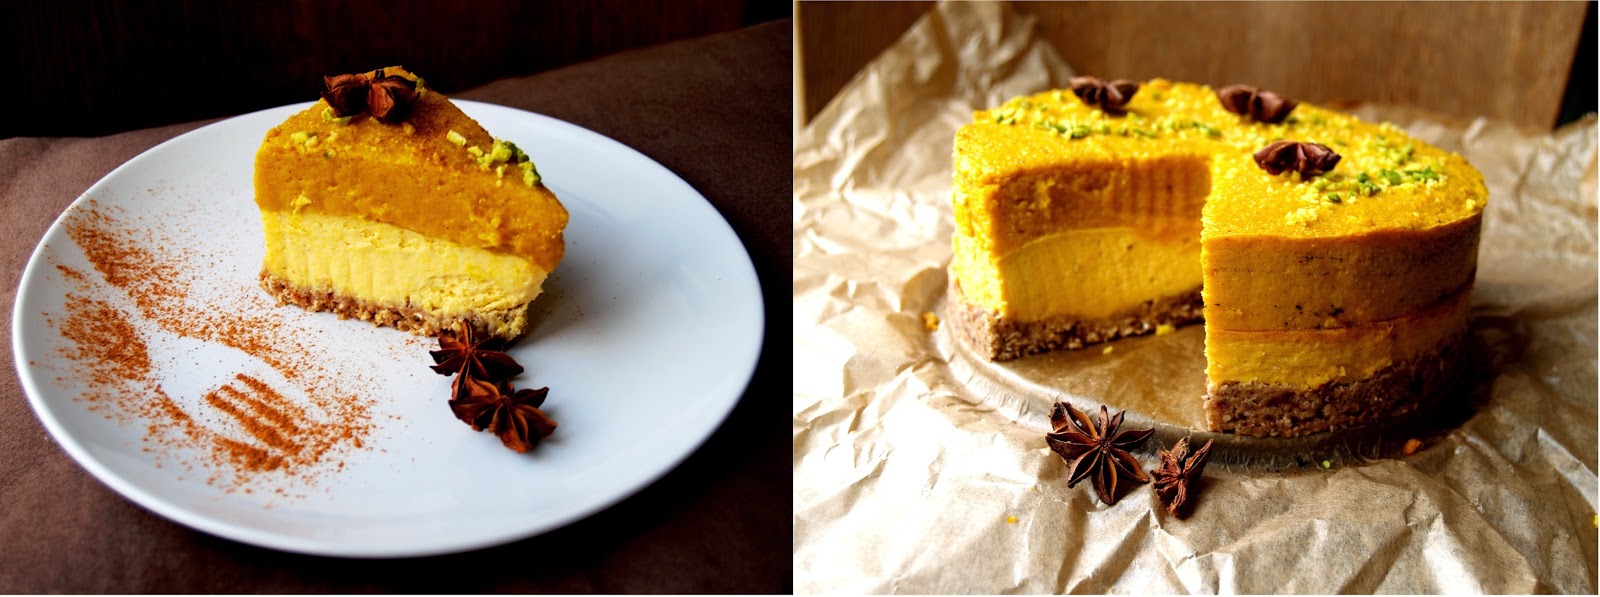
Pumpkin sugarfree three-layer-cheesecake


Of course autumn is about pumpkin. As a main symbol of Halloween it makes a definite mood and brings us good autumn memories. So I strongly believe that if we have a chance to buy a good pumpkin it's worth to do because I have a special recipe for you. A cheesecake. Not just a simple one but pumpkin cheesecake. According to statistics my first recipe had a big success. But sometimes you are fed up with the taste of the cheese and want something really special. Then just try!!! That makes a difference.


Even my strict critic scored this cheesecake as the best of all I've recently baked. Just imagine...Smooth, tender taste of cheese with added orange notes and a pleasant pumpkin layer...a perfect combination for cold autumn evenings with a big warm blanket;)

The amount of the ingredients is perfect for a round form 18-20 cm in diameter.

Ingredients :
80g old-fashioned oat flakes
80g pitted dates
4 eggs
350g low-fat creamy cottage cheese
350g pumpkin puree (baked)
2 tbsp vanilla pudding powder
1 tsp cinnamon
1 tbsp orange zest
250 ml orange juice
2 tbsp corn flour
1 tsp pumpkin pie spices (cinnamon, ground ginger, nutmeg, cloves...)

Tip!
To get a smooth creamy pumpkin puree wash a pumpkin, cut it into two halves, take out the seeds using a spoon and put the halves onto a baking sheet (cut edges faced down). Then bake the pumpkin in the oven for about 40 minutes at 180°C. A spoon will help you to get a ready-to-use puree out of the pumpkin's halves.

Heat the oven to 180°C.
For a crust blend oat flakes into dust, add pitted dates and one egg. Blend again. Put the mass into a form and using your fingertips mold the first layer. Put aside.

The middle layer will be cheesy with a bit of pumpkin smoothness and orange taste. Mix cream cheese, 2 eggs, 50g of pumpkin puree, cinnamon, vanilla pudding powder and 50 ml of orange juice. Make sure the texture is smooth. Pour it all into the form and make the middle layer. Put into the oven for 40 minutes. Meanwhile prepare the upper layer using the rest of the pumpkin (about 300g), 200 ml of orange juice, corn flour, 1 egg and pumpkin pie spices.

When your two-layer cheesecake is ready to be taken out of the oven pour the upper layer into the form and flatten it nicely. The next baking step including the upper layer will last another 20 minutes.


Tip!
Let the cheesecake cool down until it reaches room temperature. Only after that remove it out of the form to minimize damaging risks.

To add some extra flavor I served this tasty colorful beauty with orange zest and some chopped pistachios. Enjoy every piece ;)


10 November 2014

King prawns with mango-avocado salsa on a carrot pillow


Once upon a time we were looking for a special occasion restaurant. Of course, when you have a really special occasion you would prefer to find a place with a perfect combination of atmosphere, food, interior and service. Once you love the interior and feel yourself free, two things like food and service still have to be tested and tasted. On one of those testing-tasting evenings I was lucky to try a dish I couldn't wait to cook at home. A little bit changed...My own interpretation :) Imagine: sweet-creamy mango-avocado salsa on a juicy pillow from fresh carrots with spicy prawns on top. I think you shouldn't be a crazy seafood-lover to have a try. Such an attractive offer comes very rarely. So don't miss it.

Tip!
If you want to reach the best taste of this dish make sure the prawns are fresh. It's better when they are with heads, perfectly when fresh cooled. Mango and avocado should be very ripe as well. The ripeness of avocado can be checked by pressing a little bit. A ripe fruit is firm, yet a bit soft when pressing on it. When we're talking about mango try to smell it first. You will understand at once. Then use your experience with avocados, mangoes also become softer as they ripen.

Ingredients:
500g king prawns
2 carrots
3/4 avocado
1/2 mango
2 tbsp soy sauce
1 tbsp vegetable oil
1tsp lemon juice
salt, pepper, herbs


First of all, prepare salsa. Wash mango and avocado, peel them and cut into little cute-form pieces. Mix the needed amounts together and add a sprinkle of salt, lemon juice, some pepper and dried herbs. Put aside, allow the flavors become friends.

Wash the prawns, de-shell them when needed. Heat the pan with some vegetable oil of your choice. Fry the prawns for 2-3 minutes. Add soy sauce and let them soak it. Spice them with some pepper and dried herbs. Take them out of the hot pan to prevent rubber-texture.


Now let us put it all together. Wash the carrots, peel them and grate. Place them as the bottom layer. Put avocado-mango salsa as a middle layer. And finally add the prawns. A tiny sprinkle of dried herbs can be a finishing touch.


Enjoy! A taste of summer is here. Even though it's getting far-far-far away...

7 November 2014

Chocolate souffle

I've recently watched a lot of movies and series about restaurants and cooking. All those fresh cooked dishes with a delicious crisp, perfect presentation and satisfied tasters... All in all a powerful inspiration that strongly pushed me to a recipe I want to introduce today. The most favorite recipe of my husband. Chocolate souffle.

Tip! 
The secret I want to share is a rule of substitution. The original secret is rich in fat and sugar. If you use banana instead of butter you will get 2 in 1 result: firstly, high calories part of butter is excluded by mashed banana; secondly, the sweetness you would normally add in a form of sugar is already added by banana.


First of all - heat the over to 180°C. As a form I used a cooking ring. I put a sheet of baking paper under it. Of course, you can use a muffin form or any other you have. Make sure you fat it well with butter first.Then grab all the ingredients you need and lets start.

Ingredients:
90g chocolate (the best choice is the one that contains more than 70% cocoa)
50g or about 1/2 mashed banana
2 eggs
1 tsp sugar
2-3 tbsp almond flour

If you want to make the original version of the dessert here are the ingredients you need:
90g chocolate
50g butter
2 eggs
2 tbsp sugar
2-3 tbsp flour


In a little saucepan heat the chocolate bar until it melts. Take it off the heat and add mashed banana and sugar mixing it thoroughly. Now is eggs' turn. Mix them as well. After that add almond flour. You will need from 2 to 3 tbsp of it. Make sure the mixture is smooth and has no ingredients apart. Pour it into a form and put into the oven for 7 minutes. Check it after 7 minutes. The top of the souffle should be mat but it stays fluid inside.

I use to serve this lovely treat with some strawberries and a ball of vanilla ice-cream.
So as you can see a couple of minutes and some fantasy... and Voila! Chocolate souffle!


Bon Appetit! 

2 November 2014

Whole wheat persimmon pie with caramel topping

"Fruit of the gods" from Latin. Japan's national fruit. It's all about persimmon. A cute orange fruit that is rich in vitamins A, B, C, a good source of fiber, antioxidants; contains such minerals as sodium, magnesium, calcium and iron. Are you still hesitating? No way. Because I'm introducing a healthy pie recipe. Especially good fro those who are fed up with usual apple pies and think they can't be surprised anymore... NO! I can surprise you. Believe me. Get ready to bake a miracle ;)


Tip!
To turn bitterness into sweetness put the persimmon into freezer for about an hour and then let it thaw out at room temperature. You will get a sweet ripe soft fruit.

And here is the recipe itself.
Ingredients:
2 persimmons
4 eggs
250 g whole wheat flour
1 tsp baking powder
10 tbsp ice cold water
2 tbsp brown sugar
1/2 cup milk
1 tbsp whisky
1/2 tsp cinnamon
1 tsp pumpkin pie spice
7 toffees
sprinkle of salt

The main part of the pie has to be put into the oven immediately after preparing. That will ensure that your pie will come up. Therefore you have to prepare everything in advance so that you don't find yourself stuck in the middle because you can't find a measure cup to measure flour ;) So preheat the oven to 180°C. Take your baking form and  its bottom with melted butter. Wash 2 nice autumn-colored persimmons and cut them into pieces. Make a persimmon layer at the bottom of the form and leave it aside.


Now we are ready to make a pie itself. It is an old recipe from my mother who got it from her mother and the good thing is that its unique. It can be baked with a wide range of fruits and berries as well as a salty type with cheese of vegetables or even meat. So let's learn the basics.

Separate egg whites from egg yolks. Mix 4 yolks with 2 tbsp of brown sugar. Use a mixer for the best result. While mixing pour one by one 10 tbsp of ice cold water. Don't stop mixing it. Add sifted flour mixed with baking powder portion by portion. The original recipe comes along with white flour but I prefer whole wheat. You can also use white and whole wheat flours in proportion 50:50. Put this bowl aside.

Take egg whites, add a sprinkle of salt and beat egg whites until stiff. It is best to begin at a slow speed and gradually move up to high when beating egg whites. The texture of egg whites is right if you can turn the bowl upside down without a disaster ;)


The next step is to add egg whites into your yolk-flour mixture. Add at first half of the whites, carefully mix it all but try to keep the light air texture. Then add the rest and mix it all. Pour the mixture over the persimmons into your baking form and put the form into the oven. Now don't come closer to the oven for 20 minutes. It is a rule. Your pie is rising and don't even dare to intervene.
This is a perfect time to prepare the caramel. In a little saucepan warm chopped toffees with milk at low heat stirring all the time. Pour 1 tbsp of whisky to add some extra flavor. Cook the caramel at low heat for about 10 minutes.


After 20 minutes of baking time have passed you can check the pie with a wooden stick. If it's comes out wet leave the pie for another 5-15 minutes. When it is ready open the oven-door and let the pie rest for a while so that it can keep the form. Carefully turn the form upside down so that the persimmon pieces are on top. Pour caramel topping over it and enjoy the flavors, tastes, textures and lovely autumn. Serve warm - tastes unbelievable.


And remember - everything is good in moderation ;)
Bon appetit! 

29 October 2014

Marzipan hearts in dark chocolate

Whatever you want - chocolate is the answer ;) And when it comes in a combination with marzipan what can be better?!

I couldn't keep aside when the shelves of the supermarkets are packed with a wide range of Christmas sweet-stuff. So I decided to make the most popular sweets at home.
Ladies and gentlemen, welcome Marzipan hearts in dark chocolate!


Actually marzipan is made of almond paste. There are different types of it. For example, Niederegger Marzipan is produced from fine raw marzipan paste (100%). Lübeck Edelmarzipan (fine marzipan)
is produced from raw marzipan paste (90%) and added sugar (10%). Lübeck marzipan is produced from raw marzipan paste (70%) and then processed with an added sugar content of 30%. Marzipan for consumption is produced from 50% raw paste and 50% sugar. Marzipan has a very interesting history and was used firstly as a medical treatment of course;)  The first Europeans to indulge in marzipan were kings and rich people. It has been reported that Queen Elizabeth I of England, who lived from 1533 to 1603, was addicted to all things sweet. Sounds familiar? :)

Yes, we love sweets and chocolate. I will tell you even more. It is a good treat when used in moderation. Moreover - when made at home using the best ingredients. Choose dark chocolate. Its healthier than any other type and contains even such vitamins and minerals:
- Potassium
- Copper
- Magnesium
- Iron.

Dark chocolate is good for your brain. It also contains several chemical compounds that have a positive effect on your mood and health. Phenylethylamine (PEA), discovered in dark chocolate, is the same chemical your brain creates when you feel like you're falling in love. PEA encourages your brain to release endorphins, so eating dark chocolate will make you feel happier.

Tip! 
By dark chocolate I mean those bars that contain more than 70% of cocoa.


Making sweets is quick and simple. You will need a  special form. Choose the one you love the most. Mine makes 12 heart-shaped sweets. The quantity of the ingredients may vary according to the form you have. To make 12 marzipan hearts in dark chocolate you will need:

Ingredients:
100 g dark chocolate (mine contains 85% cocoa)
60 g marzipan

Divide marzipan mass into 12 parts and form 12 balls. Melt the chocolate in a small saucepan at a medium heat. Fill 1/3 of every form with melted chocolate, put one marzipan ball into every form and then pour the rest of the chocolate so that every form is full.


Put your form into a fridge to cool down if you are in a hurry or let it cool down at room temperature.
Here they are: sweet, smooth with delicate note of marzipan.... And the mood goes higher and higher!!!! Yummy!

Have a sweet day! Hugs and kisses!


24 October 2014

Colorful autumn roasted veggies

Rainy autumn, sleepy mood and pure laziness?... Give me "Five" :) Cause you're not alone.

Another autumn day inspired me to color my life on my own. And why not?! This is a wonderful season when we can enjoy plenty of local vegetables. Pepper, carrot, zucchini, celery, beet, Brussels sprouts, red onion... And that is just a part of the list. Why should we roast them? Because it doesn't take a lot of time from you. The roasting process brings a little bit of natural sweetness into the veggies and makes their flours more intensive. So don't even hesitate because the sweet-sour taste of roasted warm autumn veggies will cheer you up for sure. And the final scene when you take them out of the oven... Full of pleasant scents and so colorful.. Mmmmm... Have no more words. Let's act, my dear!

Ingredients:

1 beet
1 little zucchini
1 red pepper
8 Brussels sprouts
1 red onion
1 carrot
1 celery rib 
4 tbsp olive oil or any other you prefer
2 tbsp lemon juice
1 tsp honey
salt, pepper
1 tsp dried herbs (or a couple of fresh basil, parsley, oregano leaves)
1 tsp soy sauce
1/2 tsp white wine vinegar

Tip:
The good thing about roasted vegetables is that you can cook this dish every season and use veggies you like the most. The one thing is that vegetables should be cut into pieces of the same size. And remember: the smaller the size - the quicker they are ready.

Preheat the oven to 200° C. Wash the vegetables, peel them if its necessary. Cut into the pieces of approximately similar size. Put them into a baking pan (I have a non-stick, otherwise sprinkle the form with oil) and drizzle with 2 tbsp of the oil you've chosen. It can be sesame oil, peanut oil... Switch your fantasy on ;) Don't make a lot of layers, we don't need crowding here.

Now add a little bit of salt and pepper. Not too much!!! 

The oven is ready. Put your baking pan into the oven for 15-20 minutes. My baking pan was pretty, and yours? Let me know in the comments below :)


Watch the veggies meanwhile. They may get brown edges.
- If they're becoming brown too fast, the temperature is too high for them. Take them out.
- If after 20 minutes they still look raw leave them for another 5 minutes.
- If some of the edges are golden, the veggies look a bit softer than raw they are ready.


Prepare a sauce to open all of the tastes. Mix 2 tbsp of olive oil, lemon juice, honey, salt, pepper, dried herbs (or fresh), soy sauce, white wine vinegar. Pour the sauce over the warm vegetables so that they soak a little of it and open the pureness of their tastes.


A perfect healthy side dish, a great snack or whatever you like is ready.
Enjoy and let me know how did you color your day:)